Set Up Email Account on MS Outlook 2010 and higher versions
Step 1. If you are using Outlook for the 1st time- It will prompt you to create a NEW Account ( You May Check Step 2 and Begin ). If you already using Outlook for other Email Accounts then you have to click on File Tab > then Add Account Tab.

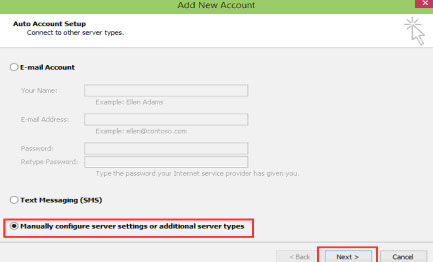
Step 2. Under the Add New Account window, you have to leave all the options blank and Select the button ( Manually configure server settings ) and the click Next tab at the bottom.
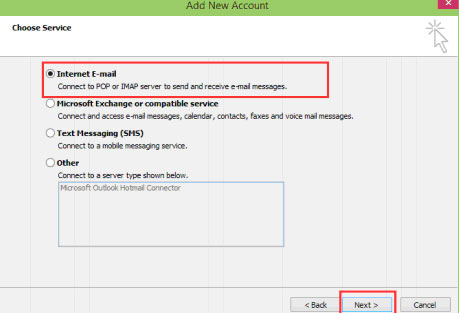
Step 3. Select the Internet E-mail option and then Next.
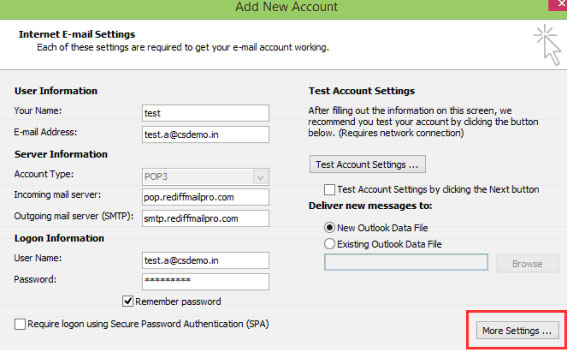
Step 4. Below is the window where you’ll enter server settings as follows for POP3 configuration:
- Your name – Your Name
- Email address – enter the complete email address.
- Account Type – POP
- Incoming mail server – pop.rediffmailpro.com
- Outgoing mail server ( SMTP ) – smtp.rediffmailpro.com
- User Name – enter the complete email address
- Password – Password of above email id
- Checkit
 on remember password box
Click on More settings Tab in right side bottom.
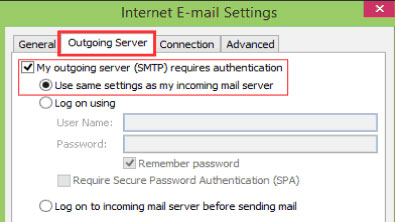
Step 5. A New Window of “Internet E-mail Settings” will appear as shown below. Click on Outgoing Server Tab on the top if this Window.
- Checkit
 on My outgoing server ( SMTP ) requires authentication.
 - Also select the option (•) Use same settings as my incoming mail server
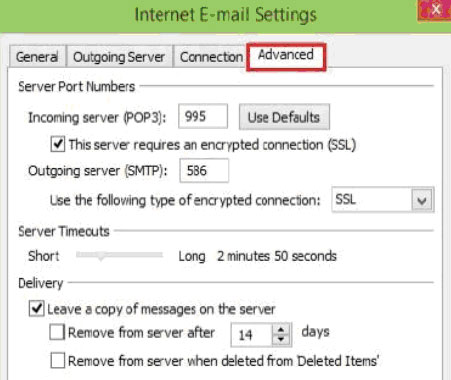
Step 6. Click on the Advanced Tab on the same window and enter below mentioned port settings.
- Incoming server ( POP3 ) : 995
- Checkit This server requires an encrypted connection ( SSL ).
- Outgoing server ( SMTP ) : 586
- Use the following type of encrypted connection: Select SSL
- Checkit
 Leave a copy of message on the server – ( check or uncheck its user-defined )
 - Click OK to close the “Internet E-mail Settings” window.
Step 7. Click Next. Then Outlook will test the settings, and confirm, “all tests completed successfully” : If this message is shown as below click on Close Tab.
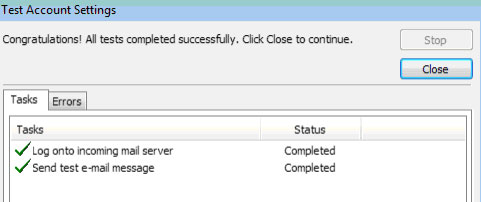
*If Outlook tells you a test fails, double-check to be sure you’ve entered the settings correctly and then Click Finish to complete the settings of adding your Email Account Successfully.
Congratulations! You have setup mailbox successfully!